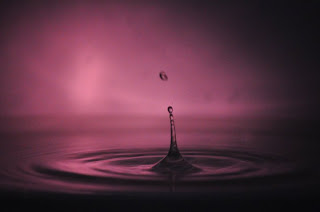
So many people are amazed at what are really simple pictures... For this update on the D90, I will attempt to show you how to take water splash pictures such as the one below.
Now to take pictures like this, it is really quite simple... There are just a few preparatory setup things, but then after that, it's just take a bunch of pictures! The directions are as follows:
1) Take a shallow basin or bowl of some sort... You want it to be as monochrome as possible.
White works the best, but black will do in a pinch. (You'll want to place this underneath something you can hang a string from...)
2) Fill it all the way too the top with water. I personally put a towel underneath mine. This helped keep the mess clean.
3) Take a plastic Ziplock bag, and fill it with water. Then, punch a paper clip through the top. Then attach this paper clip to a string. From this, you can suspend it from anything above the
basin. (I personally used a fan, and attached the string to the pull-chain.)
4) Poke a very small hole in the bottom of the bag. The goal is to achieve a very slow drip. Ideal times are about 3-5 seconds between each drip.
5) Lean a piece of plain, white paper behind the basin. This is for the reflective benefits, and to provide a uniform background.
6) Place lights around the basin, out of camera view... What works best is lighting from the side, and bouncing it off the card behind the basin. If you have Nikon lighting, all the better. You'll want to use it. Otherwise, a flashlight works really well, because it has focused light.
7) Place your camera on a tripod, and set the focus. If you place a pen or something right where the water is dropping, you can manually set the focus. Make sure you turn it onto manual! You can do this by switching your lens to 'M', and switching the little toggle on the lower left on the front of your D90. (You also want to check to make sure you are photographing the full water
splash...)
8) Take pictures! Here's where you can have fun. You'll have to adjust your camera for the first few pictures, but then after that, take as many pictures as you can. I'd recommend placing your camera on 'M' mode, so that you can control all the settings.
As far as what settings to use, here are some of the settings I used on my D90, and how to access them.
Shutter: somewhere between 1/250-1/1000. - This can be changed by spinning the back scroll-wheel.
Aperture: Set this as low as possible. - You can change this by spinning the front scroll-wheel
ISO: You'll want this as low as possible, due to your uniform background, and the high risk of grainy images. This will depend on your lighting available, but it will most likely be around 1000-1600. - This can be changed by pressing the minus button the back of your camera and then spinning the back scroll-wheel.
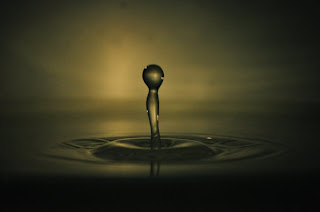
To gain the different colors, you will want to change your white balance. To do this, you have to go into your menu... On your D90, do the following:
Press the menu button -> go to the Shooting Menu, the second tab from the top -> Go down to the fifth option, White Balance -> Hit OK -> Press the right arrow key to enter the Auto fine-tuning -> This will bring up a grid with colors on it. Move the little black box around, and experiment to determine which colors you like the most. It works the best to move your preset to the extremes of the grid. (i.e. upper right-hand corner)
So now you know how to take the amazingly awesome water splashing pictures! You can easily spend hours doing this, by experimenting with lighting, white balance, shutter speeds, filters, multiple splashes, dropping a cup at once, and possibly even trying a steady stream of water effect.

Have fun, and remember, the more pictures you take, the higher the odds of just one turning out. I took about 200, and of those, I uploaded/shared about 10-12.
